TWiki> Gunwiki Web>MaintenanceProcedures>CleanARV22Upper (25 Jan 2008, SeanNewton)
Cleaning the CZ V-22 AR-15 upperI've read about near-constant jamming from the V-22 upper on various online forums, but for quite some time, mine never had a single FTF or FTE. Until one fateful day, when it started to stovepipe. At first it happened every few mags, then every mag, and then almost every other round. The dreaded "V-22 syndrome" had struck. Tonight I decided I was going to get to the bottom of it, and restore my beloved V-22 upper to its former glory.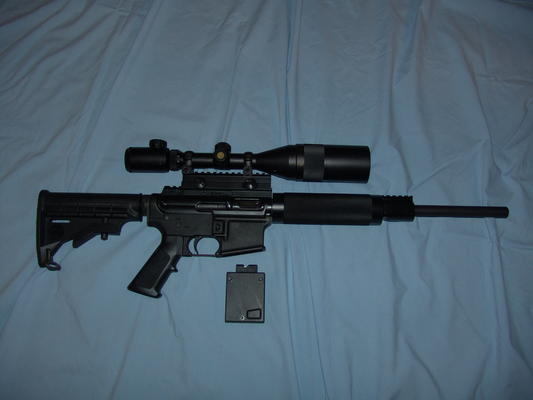
Disassembling the V-22After some considerable hammering to get its pins to release their death grip on the lower, the V-22 popped loose. After removing the optics, my next step was to open it up. If you look towards the rear of the upper, there's a pin right above where the rear pivot pin goes. You want to hit it with a polymer punch (or steel for that matter, it's YOUR upper and finish), on the side of the upper with the CZ logo. You'll notice that it's smaller on this side than it is on the other side - it's got a cap kind of like a bolt head on the other side, which means you have to drive it out from this side. You really just have to get it started, and then pulling gently with your hand will take it off from the other side. Once you've driven out the pin, the springs should push the endcap out on their own. There are two springs and two guide rods that keep the action in place. Once you pull those out (be careful not to lose the springs), you can pull the charging handle out from the side. One of the two guide rods keeps that in place. Once the charging handle is out, the remainder of the action should fall right out. If yours is anything like mine, it looked like someone poured sand and grit into it. 22's seem to leave a lot of fairly annoying residue, and gum up pretty quickly. If you wish to clean the front of the action, you'll need to remove the front sight block and perhaps the handguard. Take an allen wrench and use it to undo the screw located in the recessed socket in the middle of the front sight block. Most likely, your FSB on your upper has always been kind of loose, shifting a little. Part of this will involve fixing that, so rejoice - soon you'll be able to actually USE that rail segment for something other than a tacti-cool chunk of metal. Turn the allen screw a few turns to the left, and then you should just be able to slide the front sight block off the front of the barrel. I'm not sure, but you may be able to simply pull the barrel out of the rifle at this point, as I don't think it makes contact with the handguard. But if you should feel the need to remove the handguard, simply twist it (with the texturized grip, hand force is just fine her) and slide it down the barrel like the front sight block. Then just give the barrel a pull forward - it'll come right off.Cleaning the partsI'd start off by swabbing the front of the barrel and chamber area with some Hoppes powder solvent, to start loosening up the powder deposits. Repeat with the rest of the action, and I personally chose to wipe down the entire interior area of the upper receiver with CLP to make it slide a little easier. Basically, I just take all of the parts and wipe them with a Hoppes soaked paper towel until I don't see any more powder deposits on them. Then I use CLP to lubricate teverything afterwards, then reassemble it.Make sure to clean the extractor!The most performance-critical piece in cleaning this upper is the extractor claw. Failure To Extract is the single most frequently cited cause for dissatisfaction with the upper, and it's all in the extractor. The claw looks a little bit small and tight for the job, to me - which is to say that it can't handle much residue buildup before it starts to malfunction. A knowledgeable gunsmith might consider filing the back side of the hook to provide a little bit more clearance, but I wouldn't want to try that without consulting one. For those who don't know how to identify the extractor, that's the little claw-like thing on the right side of the bolt block. Residue likes to get under the claw, and if the extractor claw has too much residue below it, it can't reliably grab a 22LR case's rim. This results in the round extracting in a RANDOM direction within the action, which is why there's a tendency to stovepipe or (my favorite) act like it's trying to eject to the left, and stick the shell in place lengthwise. When cleaning it, make sure that you also give it a going-over while depressing the rear part of the claw (causing it to reach a little bit outwards). That will allow you to get in there a little bit better.Reassembling the upper, step by step
Reinstalling the front sight blockNow you still have the front sight block to reinstall. Look on the barrel, and note the indentation a little bit forward of the handguard. I've handled two of these V-22 uppers now, and both of them have had loose-feeling front sight blocks. The reason for this is that the guys at the factory apparently just tighten down the allen screw in what looks like 'about' the right place in order to save time. You, however, are probably more interested in a solid front sight block, and have every reason to spend the time to do it right. I found the easiest way to do it, was to remove the allen screw completely from the front sight block, then look through it and move the block until it aligned with the hole. Once it was there, I held the block as steady as I could with one hand while inserting the allen screw with the other. Once it's in place, try to wriggle the block. If it wriggles, then chances are you don't have it in the hole. It's actually very solid once you line up the indentation and the block. Although some folks may have had V-22's that came from the factory with the correct alignment, for the rest of us this is a pretty darned useful procedure. Some folks may want to lightly either scratch a dot into the barrel and the base of the front sight block, or use a dab of paint to mark where it was. That will make it much easier to re-align it when reassembling it later. -- SeanNewton - 08 Aug 2006 |

Topic revision: r2 - 25 Jan 2008 - SeanNewton


Ideas, requests, problems regarding TWiki? Send feedback