You are here: Foswiki>Gunwiki Web>RefGear>GearFlashlight511ATACA2 (17 May 2012, SeanNewton)Edit Attach
5.11 Tactical's ATAC A2 Flashlight
Overview
My review sample of this flashlight arrived on November 2nd, 2011. As of today, I've completed a two-month evaluation cycle and I feel that I can write a solid final review. Overall, I've been quite pleased with it for my specific purposes. I would suggest to people just looking for a basic flashlight, that they should consider the shorter A1 or L1 model for reduced retention issues if they intend to use 5.11's belt-clip holster with it. All the reservations I have with the items I reviewed are related to the belt holster (sold separately), which is a promising design that desperately needs improvement. While I would not hesitate to suggest this flashlight to a friend, I will say the holster should be avoided.A Walkthrough of Use
This light has a very bright central focus, and a relatively wide overall beam. The only control on this light is the push-button tailcap. In order to switch between modes, you half-press for a second or so, then release pressure for a split second and press again. If you press fully, it'll lock the flashlight into the mode you've selected until you turn it off, or if you half-press it will remain active for as long as you hold it down. In order of selection, the flashlight's three modes are:- Full intensity: 162 ANSI FL1 lumens, 1.75hr run time. Bright enough to leave spots on your vision during daylight, and blinding at night. It's visible in daylight conditions, which hasn't always been the case with other flashlights I've tried.
- Low intensity: 15 ANSI FL1 lumens, 75hr run time. It's entirely too dim for daylight use, but adequate to provide illumination indoors or at night for close-by objects without compromising your night vision.
- Strobe: 162 lumens, but flashing rapidly. This is intended to cause far greater disruption to the target's night vision than simply shining the full-intensity beam in their eyes. It's a successful attention-getter in any environment, even when not directed at the target's eyes.
Features, Pros, and Cons
Power source: 2x AA batteries- Pro: Ubiquitous; rechargeable cells widely available. Flashlight operates well on them.
- Con: Shorter life, and fewer lumens, than the Lithium model. Buying the L2 Lithium model addresses both of these concerns, at the expense of moving to harder-to-find, non-rechargeable batteries.
- Pro: Only one control; no switches on the side to worry about.
- Con: Getting exactly the mode you want is not exactly instantaneous, and getting to the strobe mode under stress is probably less reliable. Transmitting Morse code is impossible via endcap.
- Pro: Mounts easily and securely to belt. Holds flashlight well as long as you remain vertical.
- Con: Clip on flashlight bends readily as flashlight catches on things, or you sit down. Minimal tension on clip allows flashlight to pop off your belt without awareness as you sit down. While the holster's connection is delightfully solid, the flashlight itself is not retained securely and will slide out readily when sitting down, if you haven't carefully chosen where to position the clip on your belt.
Issues which I Encountered
- Sporadic failure to activate when batteries are low: When my A2's push cap stopped working on occasion, I was puzzled at first. The light was on and working until I turned it off - after which I couldn't turn it back on again. 15 minutes later, I was able to turn it on again. The reason was that unlike a lightbulb, LEDs require a certain level of input voltage in order to turn on. A low battery will frequently provide normal power for a few seconds before dropping to its normal (low) output level - once its output level has dropped, it's too low to start the LED. If you wait a while, the battery builds back up and its initial spike of power is able to trigger the flashlight. It goes without saying that it would be wise to replace or recharge your batteries promptly if you should notice that the light doesn't want to turn back on left away.
- Belt / pocket clip bending: Due to the length of this flashlight, it's relatively prone to damage at the clip if you should happen to have it mounted somewhere on your body that flexes - or if it catches on things as you walk past them.
- Weak vertical retention on the holster: While it makes for a convenient and smooth draw, the design of the holster prevents the light from being held securely. If the flashlight happens to catch as you sit down, the flashlight can easily pop out of the belt holster and you may not be able to recover it. This is the primary reason other reviewers on 5.11's site have panned this holster, and I have to agree with them. But do bear in mind that the holster does not come with the flashlight - it is a separate product, and avoiding the holster should not translate to avoiding the flashlight.
A Closer Look
As Gunwiki readers have come to expect, this is the part where I take the flashlight apart and identify what makes it behave the way it does.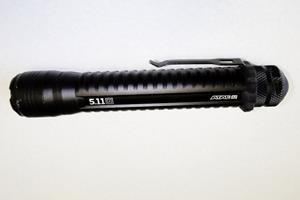 This is the flashlight, as seen from the side. Note the belt clip attached to the tailcap. This may be attached directly to a pocket or belt, or used with the quick-detach belt clip (reviewed further down).
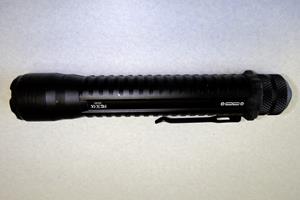 A view from the other side.
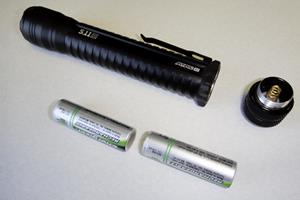 End cap off, batteries removed. As you can see, it takes two AA batteries. The endcap is substantial, but that's because it houses a fair amount of electronics.
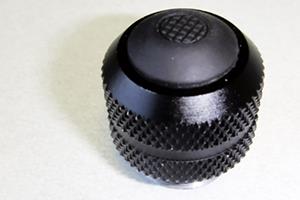 Note that there's only one control on this: a single push button. The flashlight has three modes, though - high, low, and strobe. You cycle through the modes by pressing the cap repeatedly to indicate which mode you want. In theory it sounds ok, but in practice it gets troublesome.
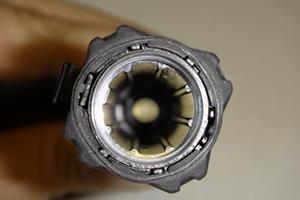 A view down the tube. Note the ribs running down the sides. These provide the advantage of a smaller tube (less room for batteries to flop around) without the corresponding disadvantage (greater risk of ruptured or swollen batteries getting lodged in the tube). It also provides improved air circulation internally, as batteries can heat up during use.
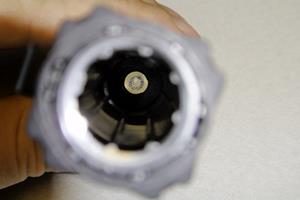 This is a view down the tube, with the focus on the end. Over a couple months of everyday wear, it's taken some scuffing from the positive terminal of the AA batteries. However, this hasn't appeared to impact performance.
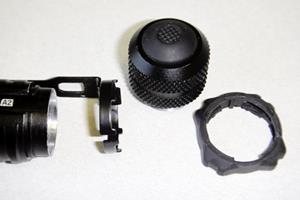 The tailcap pieces, disassembled. Note that the belt clip is a separate piece of metal, and there's a rubber collar that sits on top of it. The entire assembly is cinched in by the tailcap.
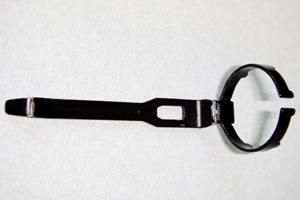 A detail shot on the belt clip piece. Notice the wear point right just to the left of the ring - this is where it makes contact with the flashlight body. Notice the other wear point near the end of the clip - this is where it rubs against the belt clip (shown later).
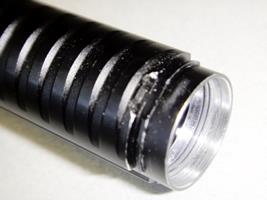 This is the tail of the flashlight's body. Notice the notch - this is not damage, it's the attachment point for the belt clip. Because there's a cutout for it, the end cap can be cinched down securely without a risk of bending anything.
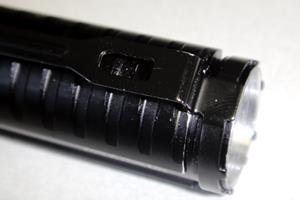 The belt clip in place. Note that it seats flush when installed, instead of pinching
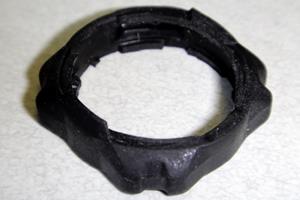 A detail shot on the molded rubber gasket. When screwed down, the two protrusions on the sides lock onto flats on the side of the light.
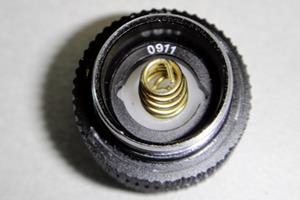 The endcap from below. Note the "0911" printed on the underside.
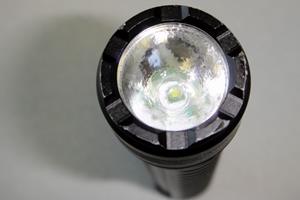 A view of the front of the flashlight. Don't let the yellow collor of the Cree XP-E LED light fool you - the light it emits is white.
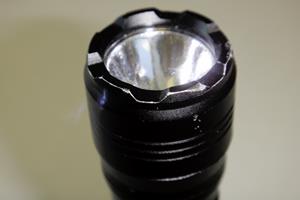 An angled shot. Notice that the front of the light is ridged. Presumably, this is for a secondary use as an impact weapon or perhaps a glass breaker.
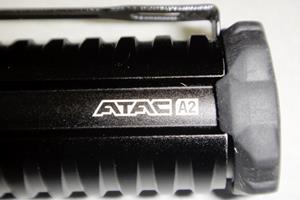 The rear of the flashlight, with the belt clip and rubber grommet attached but the endcap removed.
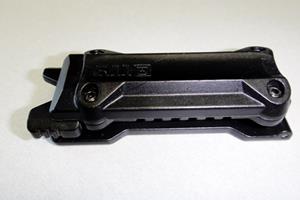 As mentioned earlier, this is the clip-on holster which attaches to your belt. The slot down the middle (better picture of that later) is where the light attaches. Notice the four screws on the front - given that I love how well the belt part works, but hate how the slot for the flashlight's belt clip fails to retain the flashlight, I may try my hand at designing an improved front end once my 3d printer project is finished. This design holds too much promise to completely abandon.
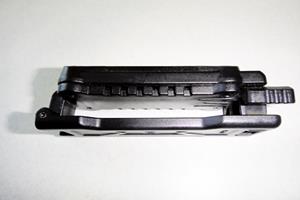 A side view of the holster. Note the ridges in the lower part of the picture - these are meant for the use of a flat part which can be moved up and down to adjust for a firm fit for a variety of belt widths. The result is a very nice, tight fit. Unfortunately, sitting or leaning can place stress on that part and it popped out twice and was recovered. Unfortunately, the third time I couldn't find it and it was lost.
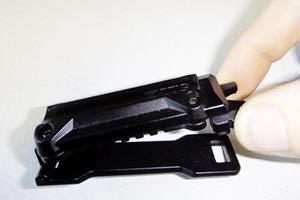 Note that if you pinch the two points I'm pinching in the photo, it unlocks so that you can unhinge the assembly.
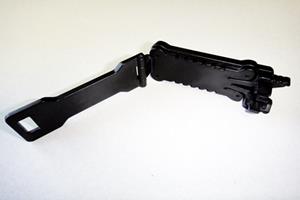 The holster unhinged. As you can imagine, it's very easy to install this on your belt.
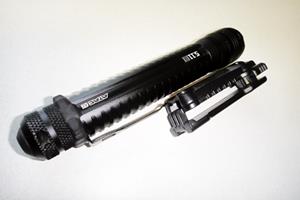 The flashlight being inserted into the holster. Notice that the belt clip on the flashlight is the point which attaches into the holster.
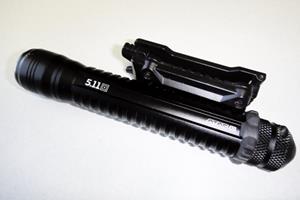 The flashlight mounted on the holster.
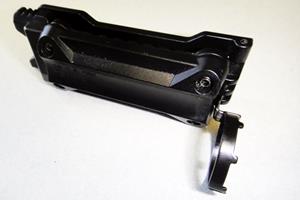 I removed the belt clip from the flashlight in order to show how it connects to the device. As you can see, it's not really held in by much more than gravity. It's secure from horizontal motion, but not vertical. This results in an effortless draw, but serious trouble with retention. If 5.11 can fix this issue, they'll have a winner with this holster.
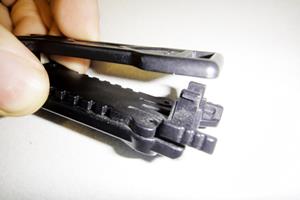 A close-up on the mechanism which locks the clip to your belt.
Availability
- 5.11's flashlight category includes the ATAC A2, as well as numerous other offerings.
- The specific flashlight I am reviewing is here.
Edit | Attach | Print version | History: r8 < r7 < r6 < r5 | Backlinks | View wiki text | Edit wiki text | More topic actions
Topic revision: r8 - 17 May 2012, SeanNewton
%META:TOPICINFO{author="ProjectContributor" date="1231502400" format="1.1" version="1"}%
 Copyright © by the contributing authors. All material on this collaboration platform is the property of the contributing authors.
 Ideas, requests, problems regarding Foswiki? Send feedback
