You are here: Foswiki>Gunwiki Web>ArticleIndexByGun>RefArFamily>ProcAr15AssembleLower>ProcAr15InstallBoltCatch (16 Dec 2008, SeanNewton)Edit Attach
Installing the AR-15 Bolt Catch Assembly
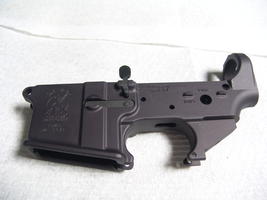
This is a step by step guide to installing an AR-15 bolt catch assembly. Each of the pictures to the right can be zoomed in on if you click on it.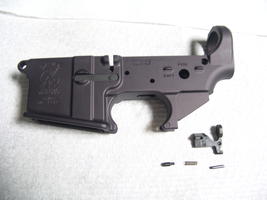 This is the AR lower, with all of the parts we're about to install sitting next to it. The receiver, the bolt catch, the spring, the bolt catch detent, and the roll pin which holds the bolt catch onto the receiver.
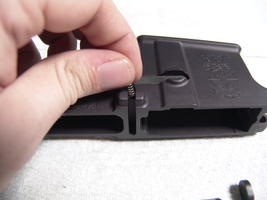 First, drop the spring into the relevant hole on the side of the lower receiver. This spring is fairly short and stiff - do not confuse it with one of the longer springs, or the comparably short but less stiff spring meant to operate the trigger disconnect. You can tell this spring from the disconnector spring by the fact that the disconnector spring is flanged out on one side, and the bolt catch spring is an ordinary spring of a comparable diameter throughout its distance.
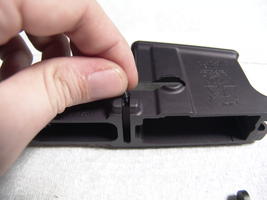 Next, drop the detent into the hole. Notice that the larger, rounded end is supposed to face up and the narrower end slips into the center of the spring you just installed.
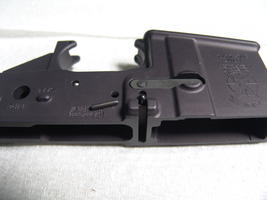 Your next step is to install the bolt catch's roll pin. You'll notice that it's tapered on one side. The tapered side is the one you need to drive into the bolt catch hole.
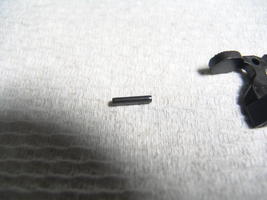 Before we get started - the black object in the center of this picture is the roll pin. Notice how one end of it is tapered (angular), and the other is flat. The tapered end goes into the hole first.
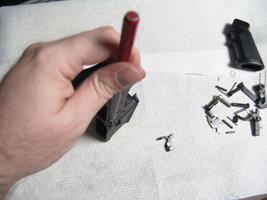 You'll want to start the roll pin into the hole, using a punch. You can use other things, but a punch works best. Strike the punch with a hammer until the roll pin goes in just far enough to be firmly in place.
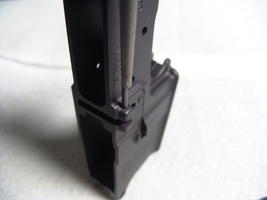 A closeup on the tip of the punch, showing proper alignment.
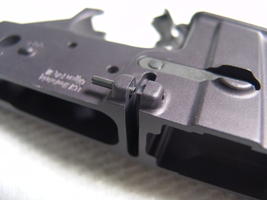 It is probable that you will have sent the pin a little bit farther than you strictly needed to. In the event that this has happened, it's easy enough to correct.
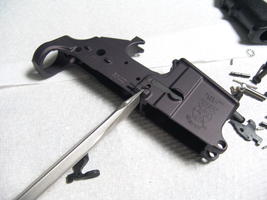 If the roll pin has travelled into the slot, then insert a large flathead screwdriver into the slot as shown, and exert a little bit of torsion (NOT much, or you may crack the receiver) to push the pin flush. You want to turn so that the end pressing on the roll pin, pushes on the pin.
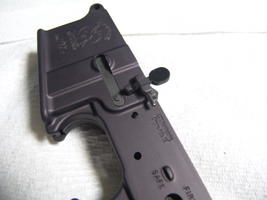 Place the bolt catch into the slot. The correct orientation is with the paddle pointing up, and the bottom more or less straight.
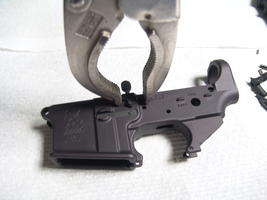 Next, take a pair of vise-grip pliers (I've found that the version made for plumbing work beautifully due to their curved jaws) and close them, then adjust the pliers so that, when closed, the jaws are just wide enough to go from the end of the roll pin to the swell on the other side of the receiver. Then remove the pliers and adjust them so that they're a bit more closed.
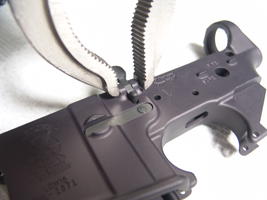 Line up the hole in the bolt catch with the roll pin, then position the jaws as shown and squeeze. If it doesn't want to move, the bolt catch probably isn't aligned. Once you've got a good position, the roll pin should move without a lot of resistance. Once it's started, all you have to do is remove the pliers, tighten them down a little more, and squeeze again. Vise grips pliers have much more optimal leverage when you're not trying to push the whole pin at once.
 And now, everything is finished. You should try moving the bolt catch with your fingers. It should spring back under tension to keep the bolt catch resting on top of where the magazine's follower will be.
Function Check
If you've installed the magazine release assembly already, you can now insert a magazine into your rifle and check to see that the bolt catch is operating. When you insert the magazine, the follower on the mag should push the bolt catch up. When you press down on the follower, it should slide down. If this is not the case, it's probably just a bit tight and you should be able to get it moving normally after tweaking it a bit with your fingers.- If the bolt catch doesn't have any spring action, check to make sure that the spring got installed. If it didn't, you're going to have to punch the roll pin back out and reinstall the bolt catch with the spring.
- If the bolt catch moves, but it requires force - work it back and forth several times. It'll probably get smoother in short order. If not, you'll have to disassemble it.
Edit | Attach | Print version | History: r1 | Backlinks | View wiki text | Edit wiki text | More topic actions
Topic revision: r3 - 16 Dec 2008, SeanNewton
%META:TOPICINFO{author="ProjectContributor" date="1231502400" format="1.1" version="1"}%
 Copyright © by the contributing authors. All material on this collaboration platform is the property of the contributing authors.
 Ideas, requests, problems regarding Foswiki? Send feedback
