You are here: Foswiki>Gunwiki Web>ArticleIndexByGun>RefArFamily>RefProDefenseFastPull (09 Sep 2015, SeanNewton)Edit Attach
Quick Overview of the Pro Defense Fast Pull
Article by Sean Newton, photos by Mark Liu. This is a quick overview of the Fast Pull from Pro Defense.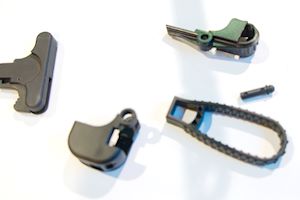 In the picture to the left, we see the collection of parts which comprise the Fast Pull assembly. To the left side of the image is a standard charging handle, which these parts go onto. The device connects to the back of a charging handle, and provides a straight-pull charging option for the AR-15. The pull loop is connected right in front of the latch, so a pull on the loop automatically releases the charging handle before it travels back.
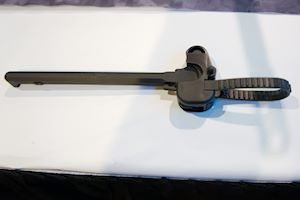 Completely assembled. Another version of this tool exists with a different pull tab (replicating the horizontal design of the charging handle, but extending it back).
Installation
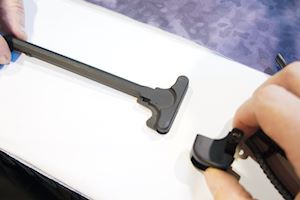 The first step of installation is attaching the main body. It just slides over the T-handle. Obviously, this is not compatible with tactical oversized latches on the charging handle.
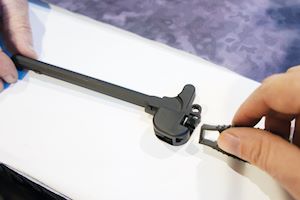 The second step, is installing the pull loop.
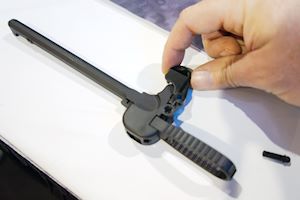 The third step is this cross-piece, which goes through the center and holds the pull loop in. Because the force the shooter exerts on the loop is directly in line with the latch on the charging handle, a complex linkage is unnecessary.
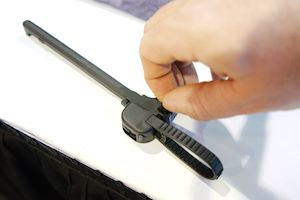 This is the final stage of assembly - there's a pin which you install, connecting the three pieces of the Fast Pull device.
Impressions
I evaluated this briefly at SHOT 2015, and it seemed to work fine. I didn't have the time to test for failure modes, but my initial impression was that it seemed to work smoothly, and my primary use for this would be for disabled shooters. The pull loop definitely reduces the degree of finger dexterity required in order to manipulate an AR-15's action. -- %USERSIG{SeanNewton - 26 Jan 2015}%Edit | Attach | Print version | History: r2 < r1 | Backlinks | View wiki text | Edit wiki text | More topic actions
Topic revision: r2 - 09 Sep 2015, SeanNewton
%META:TOPICINFO{author="ProjectContributor" date="1231502400" format="1.1" version="1"}%
 Copyright © by the contributing authors. All material on this collaboration platform is the property of the contributing authors.
 Ideas, requests, problems regarding Foswiki? Send feedback
